You can manage your company’s website using the Company Configuration page on Zap. Click on “Manage” in the left navigation panel, then “Configurations” to modify the content your visitors see, including your cover photo, module headings, social media links, and more. You can also make changes to company settings, like your company’s coverage area.
Cover Photo
Your cover photo will be a large central image displayed behind your search bar and tagline. This will display on your company’s desktop and mobile sites. You can use your cover photo to distinguish your company’s branding and create a positive first impression for your visitors.
Click “Change cover photo” to upload an image from your computer to use as your cover photo. Use a large image – the minimum size is 1920 x 1080 pixels. Once loaded, you’ll be able to crop the image using the cropping tool. The photo must be one that you have rights to use – click to agree and upload.

Basic Info
This section displays all your basic information, including your brand, company, status, phone number, address, and more. If any of the information looks off, make any needed changes in dash.
Company Website
Use this link to direct customers to the company website. If the company has a vanity URL, you can direct that URL to this link.
Mobile App Referral Link
Use this link to direct customers to download your company’s mobile app. When customers download the app via this link, they should see your company’s branding on the registration page.
Content
Homepage Modules
Your company’s website will feature several modules that you can choose to display to customers or modify under the Content tab on the Configurations page. Click the “Display to consumers” toggle button located to the right of each module to either hide or display these modules.
Homepage Headline
Your headline will appear as text over your company photo and will be displayed just above the search bar on your homepage. Click the pencil icon next to “Headline” to enter a new headline. Keep it short – 20-25 characters is best, and you can enter up to 50 characters.
About Us Module
Your company’s About Us module will be displayed beneath your cover photo and your search bar. Use this module to describe your company to your website’s visitors and differentiate yourself.
Click the pencil icon next to “Heading” to modify your About Us heading and content.
- Heading. Your About Us heading is a brief phrase to introduce your visitors to your main About Us content. Use no more than 50 characters.
- Content. Your About Us content is a brief description of your company and can include a few sentences on what sets your company apart, your mission or company ideals, or anything else you want potential clients to know about you when visiting your homepage. This should be formatted as a paragraph without bullet points or lists.
YouTube Video
Use this section to display a video all about your company. Copy the URL of the YouTube video you’d like to display, and paste it in the field provided. You must be the owner of this video. If you would like to add a link to your YouTube channel, you can use the Resources module.
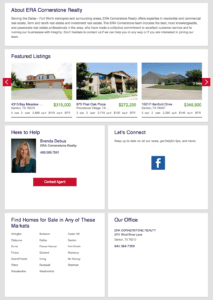
Featured Listings Module
The Featured Listings module shows your company’s recently listed active properties and is displayed beneath your About Us module.
Click the pencil icon next to “Heading” to change the phrase that appears above your company’s featured listings. Your phase must be 50 characters’ maximum.
Open Houses Module
The Open Houses module features upcoming Open Houses from your company’s active listings.
Click the pencil icon next to “Heading” to change the phrase that appears above your upcoming open houses. Your phrase must be 50 characters maximum.
Agent Module
The Agent module features agents within your company on a random basis.
Click the pencil icon next to “Heading” to change the phrase that appears above your featured agent’s information. Your phrase must be 50 characters maximum.
Social Module
The Social module displays links to your company’s social media profiles, including Facebook, Twitter, LinkedIn, Google +, and Yelp.
Click the pencil icon next to “Heading” to make changes to your Social module.
- Heading. You can start by modifying the heading to a short phrase such as “Let’s Connect” or “Connect with Us”. Keep your phrase 50 characters maximum.
- Content. You can also modify the content (the text that appears inside your Social module). You can include a sentence prompting your site visitors to check out the social media links below, such as “Stay up to date with our news and tips” or “Follow our company for more updates.”
- Social Profiles Displayed. You can add direct links to your social media profiles by clicking any of the social media icons. Copy and paste your company’s social media URL into the field when prompted.
Icons without social media links will be displayed in gray on your Configuration page and won’t be visible to consumers. Once you add a link to your company’s profile, the icons will display in color on your Configuration page and will be available for consumers to access.
Areas Served Module
Your Areas Served module is a section on your website’s homepage that features up to 21 cities that you’d like to highlight for customers. Each city that you include in the module will appear as a clickable link to a corresponding search results page.
You can customize the module by adding and removing cities and changing the order in which the cities appear. You can also customize the title of the module.
Please note: Changing the cities that are publicly displayed in your Areas Served module will not impact your website’s coverage area. Your customers will still have the ability to search anywhere within your company’s service markets.
Think of this module as a place to highlight the major cities you do business in and provide quick links to your customers – not as an exhaustive list of the areas you cover.
Follow these steps to customize your Areas Served module:
- If you’d like to customize the module heading, click the pencil icon and type in a new heading. Your new heading can be up to 50 characters long. When you’re done, click Save.
- Under “Cities,” you’ll see all of the cities that are currently visible in your module.
- If you’d like to remove a city, hover over it and click the X.
- If you’d like to add a new city, click “+ Add new city here” below the list. You’ll see a blinking cursor appear. Start typing the name of the city (the city must be within your company’s service markets). If you already have 21 cities, you’ll need to remove one first. Check the orange bar to see how many cities you have remaining.
- If you’d like to reorder the cities, click a city name and drag it to your preferred position.
You can also customize the module for each of your branch offices. To do so, click “Branches,” select “View Branch” for the branch you’d like to customize, scroll to the Areas Served section, and follow the steps above.
Offices Module
The Offices module will display the addresses and phone numbers of each of your company’s offices, pulled directly from dash.
Click the pencil icon next to “Heading” to change the heading that appears above the contact information for your company’s offices. Use no more than 50 characters.
Mobile App Module
The Mobile App module allows you to feature a heading and content prompting customers to download your mobile app.
Click the pencil icon next to “Heading” to change the heading and content. When you’re done, click Save.
Local Insights Module
The Local Insights module will display Local Insights posted by members of your company’s team. The Local Insights displayed here will be primarily broker and admin-generated.
Click the pencil icon next to “Heading” to change the phrase that appears above your company’s featured Local Insights.
Click “View Details” on the right of each listing to edit your Local Insights.
Click “+ Add Local Insights” to add your own Local Insights.
- City/Neighborhood. You can write Local Insights for both cities and neighborhoods. Select a city or a neighborhood first, then start sharing your thoughts.
- Headline. Give your post a catchy header. Keep it under 50 characters.
- Comments. Share your insights about the city or neighborhood with potential home buyers in your own words. Give a balanced description of the area and share what you know from visiting the area in person.
- Tags. You can include tags, or keywords, that describe this city or neighborhood. Zap will use these tags to better organize your content, but they won’t be displayed to consumers on your website.
When you’re done, click Save.
Local SEO Playbook
The Local SEO Playbook makes it easier for new online leads to find your website by improving your search engine optimization (SEO) with the tasks laid out in this section.
There are 25 tasks categorized under 4 activities – Migration, Linkbuilding, Content, and Social Media. Click on each activity and select which tasks you’ve completed.
- Migration. When moving from your current website to your new Zap website, you’ll want to continue to rank well in search engines, so that you can keep getting plenty of organic search traffic. A crucial step in the success of your new website is making sure that you map your old URL (that Google is familiar with) to your new site’s.
- Here you’ll find tasks associated with updating and managing your directories. It’s important to make sure that all of your contact information is correct and consistent across all of the directory profiles.
- Adding unique content helps your website rank well in search engines.
- Social Media. Share and drive traffic to your site with your Twitter, Facebook, LinkedIn, Yelp, YouTube, and Pinterest accounts.
Feel free to check off tasks as you complete them and come back to update the list whenever you’d like!
Resources Module
Using the Resources module, you can link out to up to 7 web pages from your Zap site’s home page. This is a great opportunity to share links to lenders, inspectors, or other partners, or even to link out to your own additional resources, such as your company’s YouTube channel.
To add a new Resource, follow these steps:
- In the field labeled “Add Name Here,” type in the name of the resource (for example, West Lake Lending or Angela’s Blog).
- Copy and paste the URL of the webpage you want to link to under “Add Resource URL Here”.
- Choose a category from the list of options provided, and click Save.
If at any point you’d like to edit the name, URL, or category for a resource, just click the pencil icon to the right of it. If you’d like to remove a resource, just click the trash can to the far right.
Custom Footer Content
You can use the Custom Footer Content section to add any additional contact information or legally required info to the footer on your company website. This footer will appear at the very bottom of each page on your company’s website.
Recruiting URL
You can paste a link to your recruiting website in this field. This will appear as a link in your company website’s header or footer, depending on your brand.
Google Analytics Tracking Code
You can paste your Google Analytics tracking code in this field, if you have a Google Analytics account and want to see the analytics for your Zap website.
Correct Google Analytics Tracking ID format:
UA-########-# (should start with UA-8numbers-1or2numbers at the end)
Non-Zap Website Link
If you have another company website you’d like to link customers to, paste its URL here. This link will display in a new module on your Zap company website.
Mapping
This section of your Configuration page will display the MLSs that are providing IDX feeds for your Zap company and agent websites and the metros that your company serves.
MLS Mapping
Your company will be mapped to the MLSs that you are a member of.
Listing Display Option
This setting allows you to display only your company’s own listings by toggling the button to green.
Consumer Product Status
This feature activates the company on Zap’s consumer products, making the website visible to potential consumers. When the button is toggled to green, your company’s website is live.
Markets
This section shows all the markets that your company covers. Markets are large geographic areas spanning multiple ZIP codes, where consumers on your company’s website can search for homes.
You have the option to either “Default all agents to cover company service markets”, or “Configure individual agent’s service markets.”
Under “Market,” you’ll see all of the markets that your company covers.
You can click the + to the left of “Market” to expand or collapse all markets.
The Status column tells whether the market is on or off.
Expand each market to view more information, including the following:
- Agents Eligible for New Leads. This section provides an overview of all the agents in your company with assigned ZIP codes within this market.
- Zip Codes Assigned to Your Agents. This section provides an overview of all the agents in your company with assigned ZIP codes within this market.
- Unassigned Zip Codes. These are ZIP codes that none of your company’s agents are assigned to. Your agents will not receive leads in these ZIP codes.
- Agents Who Can Service Existing Customers. These are all of the agents in your company who will continue to receive requests and track the activity of existing customers within this market.
- MLS. These are all the MLSs within this market.
Branches
This section displays the name, address, status, and number of personnel for your company’s branches and allows you to view branches.
To modify a branch configuration page, first click “View Branch”.
Branch Info
You’ll see information such as your branch’s phone number, name, and address listed under Branch Info. You can change the branch name that will be displayed to consumers by clicking the pencil icon at the top of the page.
If any of the information looks off, you can update it in dash. Click “Refresh Office Data” if the changes aren’t visible on the branch configurations page.
Content
The Content section will allow you to add an About Us description to your branch detail page.
Click the pencil icon next to Content to get started. Use this space to provide details and a description of your branch office. When you’re done typing in your About Us content, click Save.
You can also configure the branch’s area’s served module just as you can for the company homepage – follow the instructions referenced earlier in this article.
Personnel
Branch Personnel will display personnel with roles assigned at your branch office’s level. Click on “View All” next to any role type to see a list of all individuals within the branch with that role.
Personnel
This section will allow you to see the number of Personnel in each role within your company, including Business Managers, Admins, Content Managers, Agents, and those with Change User permissions. Click on View All next to any role type to see a list of individuals within the company with that role.
Settings
This section allows you to control Notification, Auto Lead Welcome Emails, and Lead Export Restrictions. Click the toggle button located to the right of each module to turn these options on or off.
Notifications
This will allow agents to receive text and email notifications form Zap for new leads and requests.
Auto Lead Welcome Email
Enabling this allows agents to automatically send a welcome email to new and reassigned leads that come into Zap from an external (non-Zap) site.
Lead Export Restrictions
Enabling this restricts agents’ ability to export broker leads.
ZapStore
The ZapStore is an online marketplace within Zap where you can search for various applications and services that can help you better your business, including transaction tools, brokerage operations, closing gifts, marketing, and ancillary services. When the button is toggled to green, it means that application is being displayed in your Quick Links section on your company’s website.