Local Insights are short posts you can write describing cities or neighborhoods to customers on your website. They’re a great way for agents to showcase their local expertise – and they’re also a great way for brokers, managers, and Zap Specialists to post content that reflects the company as a whole and improve their company’s reputation as a go-to resource for useful, local content.
How to post Local Insights for your company
You can post Local Insights for any city or neighborhood within your website’s coverage area via your Company Configuration page. Here’s how:
- Click Manage in the left navigation panel.
- Select Configurations from the options provided.
- Once you’re on your company’s Configuration page, select Content from the row of options beneath your company cover photo and logo, and then scroll until you see the Local Insights Module.
- If a broker, manager, or Zap Specialist has already posted any Local Insights, you’ll see a list of them beneath the customizable heading section. At the bottom of that list, you’ll see a button labeled + Add Local Insights. If you’re posting Local Insights for the first time, you’ll just see that button. Click + Add Local Insights to get started.
- You’ll see a screen titled “Add Local Insights” with a search bar on the top left. Start typing the name of the city or neighborhood into that bar. You should see the neighborhood appear in the list below. Once you do, just click the name to select it.
- Review the tips section on the left side of your screen. Now, you’re ready to start creating some content!
- Enter a brief headline (up to 50 characters) in the headline field. (A tip: you can always fill out this field after you’ve written your main comments if that helps you summarize your thoughts.)
- Share your insights about the city or neighborhood in the comments section. Unsure about what to write? Check out our tips below!
- You’ll see an optional tags section beneath the comments section. If you’d like, you can enter up to 5 tags that describe the area, separating each tag with a comma. These won’t be displayed to consumers on the website, but Zap will use them to organize your content.
What your customer sees
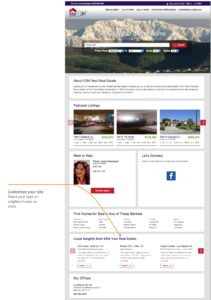
Your Local Insights will be displayed on the search results pages for that particular city or neighborhood on your company’s website. This will give customers a look at what you have to say about the area as soon as they execute their search, so they know that your company has the knowledge and expertise they need early on. This placement is great for getting customers engaged early in their home search process.
Your Local Insights will also be displayed on your company website’s home page in their own module. Customers will see the 3 most recent Local Insights posted by brokers, managers, or Zap Specialists and will have the option to scroll through and read more. This module will prioritize content generated by people with access to your Company Configuration page, but if you have the module visible to consumers and don’t have any admin-generated content, it will display content written by agents in your company until you’ve added more content.
If customers find what you’ve written helpful, they can say so by clicking the “Helpful” button next to your Local Insights. This is also a way to get them to register so you can start helping them directly!
How to edit or remove Local Insights
You’ll be able to access your company’s Local Insights on your Company Configuration page. From there, you can review all your Local Insights, make edits, and delete Local Insights if you’d like.
- Click Manage in the left navigation panel.
- Select Configurations from the options provided.
- Once you’re on your company’s Configuration page, select Content from the row of options beneath your company cover photo and logo, and then scroll until you see the Local Insights Module.
- You’ll see a list of Local Insights for your company beneath the customizable heading section. If you’d like to see the full list, click View All Local Insights. From there, you can type in the name of the city or neighborhood to find the post quickly.
- When you find the post for the neighborhood or city you’d like to make changes to, click the View Details
- If you’d like to edit your Local Insights for that particular area, go ahead and make changes to the headline, comments, tags, or all three. Click Save when you’re done. You’re all set!
- If you’d like to delete your Local Insights for that area, click Delete Insights in the bottom left, and click Delete again when you’re asked to confirm.
Tips for writing effective Local Insights
- Give a balanced description of the neighborhood or city – customers don’t necessarily need you to “sell” the area to them, but they do want information that can help them decide whether the area sounds like somewhere they’d like to live.
- At the same time, be careful not to write content that inappropriately steers buyers or violates the Fair Housing Act.
- Be specific! Your Local Insights will be most useful when you share what you know from visiting the area in person, talking to past clients who live there, and experiencing the scene for yourself.
- Double-check your spelling and grammar. First impressions count!
- Your company is unique – so make sure your Local Insights are, too! Use your own words and give your writing some personality.
- Mix it up – write Local Insights for both cities and neighborhoods so customers can get a variety of information.