What is a Follow-up Plan?
A Follow-up Plan is a sequence of reminders and automatic emails that help you keep in touch with your contacts. Once you set up a Follow-up Plan, you will receive dashboard reminders to stay in touch. If you set up automated emails, these will go out with no required action on your part.
Add, change, or remove a Follow-up Plan
Add a Follow-up Plan
- From the Contacts list, select a contact.
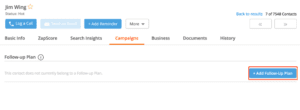
- Click the tab, Campaigns. Then, scroll to the section, Follow-up Plan.
- Click +Add Follow-up Plan.
- Select a Follow-up Plan.
Change or remove a Follow-up Plan
- From the Contacts list, select a contact.
- Click the tab, Campaigns. Then, scroll to the section, Follow-up Plan.
- Click on the arrow to the right of View Plan.
- Select Change Plan or Remove Plan from the dropdown.
Progress a Follow-up Plan
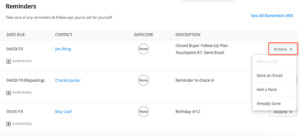
A reminder will appear on your dashboard when it’s time to progress a Follow-up Plan. To progress your Follow-up Plan, you can click the Actions drop-down and select Send an Email, Add a Note, or Already done.
Create a Follow-up Plan
Create a Follow-up Plan to include your own email and call scripts. Before you start, make sure you’ve loaded any scripts you’d like to use into the Script Library. Learn how to add your own email scripts.
To create your own Follow-up Plan:
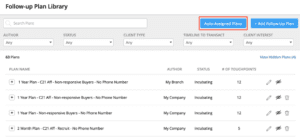
- Click on Manage > Follow-up Plan Library.
- Click +Add Follow-up Plan on the top right.
- Fill out the required fields:
- Name
- Description
- Status
- Determine the touchpoint sequence. Select the method of contact (phone, email, or automated email), timing (days after), and the script you’d like to use. Do this for each touchpoint.
- Click Save.
What is an Auto-assigned Follow-up Plan?
Auto-assigned Follow-up Plans save you time by automatically assigning each of your contacts to a Follow-up Plan based on their contact status. For example, if you want all your New contacts to receive the New Contact Follow-up Plan, you can use auto-assignment.
Turn on auto-assignment
- Click on Manage from the left navigation panel.
- Select Follow-up Plan Library.
- Click Auto-assigned Plans in the top right corner.
- Toggle the button to the left of each status to turn auto-assignment on or off.
Change the Follow-up Plan for a status
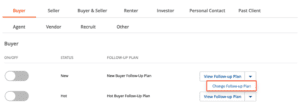
- Click the arrow to the right of View Follow-up Plan.
- Select Change Follow-up Plan from the drop-down menu.
- Select a Follow-up Plan.
- Click the blue Select button next to the Follow-up Plan you want.
- We will ask you to confirm your action. Click Sounds good!